Homemade Doughnuts: Glazed & Delicious
Jun 15, 2025 / btwgardenmachine/
Understanding the Ingredients
Before diving into the mixing process, it's important to grasp how each ingredient contributes to the dough. Flour forms the backbone of the dough, creating structure through gluten development, which is vital for achieving the right rise and texture. Water activates the gluten and binds everything together. Yeast, when used, acts as the leavening agent, giving the dough its airy quality. Ingredients like salt, sugar, and fats each play unique roles in flavor enhancement and texture refinement. Knowing these functions will help you mix with confidence and precision.
Preparing Your Workspace
A clutter-free and well-prepared workspace sets the stage for successful dough mixing. Lightly flour your work surface to prevent the dough from sticking. Having all your ingredients and tools within reach minimizes distractions and keeps the process smooth. This upfront effort pays off in a more enjoyable and efficient baking session.
Adding the Dry Ingredients
Start by whisking together the dry ingredients—flour, salt, and any other dry additives like sugar—in a large bowl. This ensures even distribution, which is key to avoiding pockets of uneven flavor or texture in the finished product. A uniform dry mix lays the groundwork for consistent results throughout the baking process.
Incorporating the Wet Ingredients
Slowly pour the wet ingredients into the dry mixture, stirring just until a shaggy dough forms. Be gentle to avoid overworking the gluten, which can make the dough tough. Watch the dough's consistency closely as you add liquids, adjusting as needed for a smooth, cohesive blend.
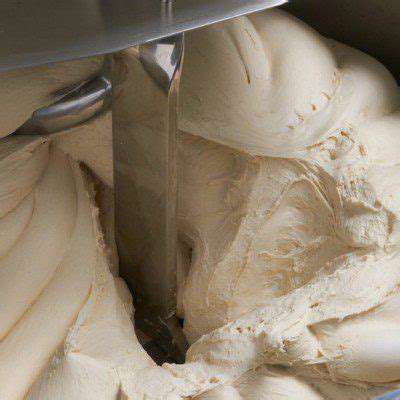
Kneading the Dough
Kneading is where the magic happens—it develops the gluten network that gives dough its elasticity and strength. Proper kneading transforms the dough, creating the ideal structure for a light, well-risen final product. Spend the recommended time on this step to ensure your dough has the necessary resilience.
Resting and Shaping the Dough
After kneading, let the dough rest. This pause allows the gluten to relax, making the dough easier to handle and shape. The resting period is crucial for achieving the right texture. When it's time to shape, follow your recipe's guidance carefully to ensure proper form and optimal rise during baking.
Shaping Your Doughnuts: Creating the Perfect Form
Doughnut Size and Shape
Consistency in doughnut size and shape ensures even cooking and visual appeal. Use a doughnut cutter or cookie cutter for uniform circles. Experiment with sizes to find the perfect balance—large enough to satisfy but small enough to handle easily. Well-proportioned doughnuts fry evenly and look inviting.
Ingredient Ratio: The Key to Success
The secret to light, flavorful doughnuts lies in precise ingredient ratios. Too much flour yields dense results, while too little creates a sticky mess. The right amounts of sugar, eggs, and milk contribute to golden color and tender texture. Measure carefully for batch-to-batch consistency.
Mixing the Dough: A Gentle Hand
When mixing doughnut dough, restraint is key. Overmixing develops excess gluten, leading to toughness. Aim for just enough mixing to create a smooth, unified dough that's neither too sticky nor too dry. Gradual incorporation of ingredients ensures proper blending without overworking.
Frying the Doughnuts: Achieving the Perfect Golden Hue
Proper frying technique delivers that ideal golden-brown crust. Use a deep fryer or heavy pot with enough oil to fully submerge the doughnuts. Maintain consistent oil temperature and avoid overcrowding the fryer. These steps ensure even cooking and that perfect crispy exterior.
Glazing Your Doughnuts: The Finishing Touch
The glaze is your chance to add personality to your doughnuts. Explore options from classic powdered sugar to chocolate or fruit-flavored varieties. Apply glaze smoothly and evenly, letting it set properly before serving. A well-executed glaze elevates both flavor and appearance.
Cooling and Serving: The Final Steps
Cool doughnuts on a wire rack to prevent sogginess. Avoid stacking them while warm. Serve at room temperature or slightly warm to highlight the flavors. Proper cooling makes all the difference in texture and taste.
Storing Leftover Doughnuts: Keeping Them Fresh
Store extras in an airtight container at room temperature for short-term freshness. For longer storage, refrigerate them. Proper storage preserves texture and flavor for future enjoyment.
Glazing & Serving: The Final Touches
Glazing Options for a Sweet Finish
Glaze selection can transform your doughnuts. Classic powdered sugar offers simplicity, while cinnamon-sugar adds warmth. For indulgence, try chocolate or maple glazes. Fruit-infused options like lemon or orange provide bright contrast. Adjust thickness to control texture—thinner glazes spread easily while thicker ones create dramatic finishes.
Serving Suggestions for a Delightful Experience
Presentation enhances enjoyment. A simple dusting of powdered sugar adds elegance. For gatherings, let guests customize with toppings. Pair with coffee, milk, or hot chocolate for a complete treat. Fresh fruit or whipped cream can complement the flavors beautifully.
Tips for Perfect Glaze Application
Cool doughnuts completely before glazing to prevent drips. Use a spoon or piping bag for even coverage. Adjust glaze consistency as needed—add liquid sparingly if too thick. Wipe away excess for clean presentation.
Storing Your Glazed Delights
Store glazed doughnuts in an airtight container at room temperature for up to a day. Refrigerate for longer storage, though texture may change slightly. Proper storage maintains quality as much as possible.
Presentation and Display for Maximum Impact
Elevate your presentation with decorative platters or tiered stands. Add fresh herbs or colorful backdrops for visual interest. Match your display to the occasion—casual for family, elegant for guests. Thoughtful presentation makes the experience memorable.